
Travel photography can be stressful. Most of the time, you’re only in the one place for a limited amount of time, with a small window of time to get your shot. If you’re travelling in high season, in all the main tourist spots, you’re probably contending with hordes of people, or hot, sticky weather, and it’s hard to get anywhere at the right times. It doesn’t make it any easier than everyone is trying just as hard as you to get the “perfect” photo, and your shot is often obscured by selfie sticks popping up out of nowhere.
But travel photography can also be the most rewarding kind; by its very nature, it can produce some of the most inspirational and beautiful photos you’ll ever capture. If you’re already a fan of landscape photography, travel photography adds another dimension and has its own additional challenges. It’s not always easy to carry tripods and other clunky equipment with you while you’re travelling, but it’s often necessary in order to produce beautiful travel photos.
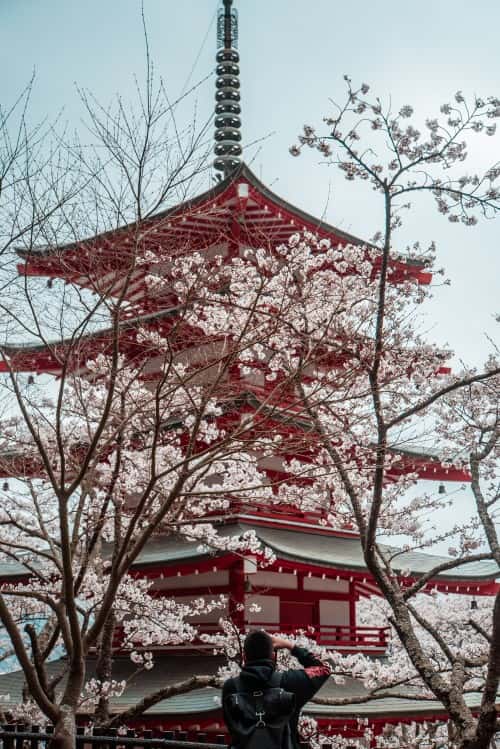
The best travel photographs are created through a combination of luck and skill. In some scenarios, you simply have to be in the right place at the right time; to see the Northern Lights on a perfectly clear night, to catch the Japanese cherry blossoms in full bloom, or to shoot a flock of birds rising up over an African savannah at sunset.
Luckily, with the correct planning and preparation, and by developing and enhancing your travel photography skills, you can create fantastic and unique travel photos that you’ll treasure forever.
Here are our fool-proof travel photography tips:
Get the right travel photography equipment
The last thing you want when you’re travelling is to run out of memory cards for your photos while you’re traveling through a remote Vietnamese village to a place you’ll probably never return to. You’ll want to travel with a stack of memory cards, particularly for a long trip and if you’re shooting in RAW or wanting to shoot videos, you’ll need much more room on the memory card.
You may also want to bring a light-weight tripod, a selection of lenses and, most importantly, a weather-resistant bag which allows you to easily carry your equipment without putting pressure on your back.
That said, you don’t necessarily need all this equipment. If you like, you can use one or two lenses and supplement with a high-quality smartphone camera when you don’t want to lug a larger camera around. Smartphone cameras can produce high-quality photography but struggle in darker settings and remember, you want to capture as much detail as you can to give the image depth and help it feel more realistic.
Do your research
Probably the most important aspect of travel photography is planning. After all, you don’t want to end up with the exact same travel shots as millions of other people. When visiting a new city, there will likely be many different areas of the city you want to visit. Each section of every large city usually has its own unique architecture and interesting cultural quirks; different architectural shapes, different coloured buildings, or even different kinds of people from all walks of life. Take London for example; large, leafy green parks contrast with grimy cityscapes, or older, heritage-style homes, or sleek and modern inner-city buildings. There’s also Chinatown which offers an entirely different visual perspective or the graffiti-covered laneways of areas like Shoreditch.
As well as the main tourist areas, planning out your shots helps you discover areas which are off the beaten track. To find these, you’ll either need to do in-depth research online beforehand or ask locals or friends once you arrive for the best travel photography spots.
Plan your shot
It’s important to plan your shots where you can, while you are traveling. Timing is crucial in getting your lighting right. Scout your location, figuring out the best time for optimal lighting. The best time for travel photography is generally during the “golden hour”, known as the time just before sunrise or just after sunset, when the light plays beautifully across landscapes, creating textured, three dimensional settings, with shadows playing softly across the scenery.

Trying to shoot in full daylight is difficult; not only because of the harsh lighting, but because, if you’re in a major tourist area, there’s probably a lot more people out and about during the day.
Try something different
Creativity is key in travel photography. The rise of globalisation and social media means that we’re sharing photos digitally like never before. This is great, as we can learn all about new places and become inspired by what we see. But it also means that it is becoming more and more common to see the same shots of the same places.
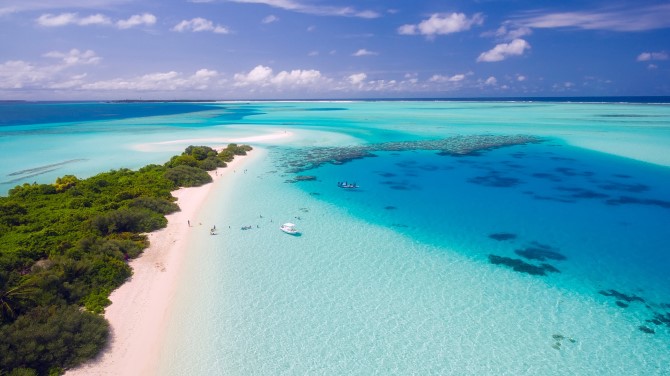
Once a place becomes popular on travel blogs or on Instagram, millions of people will flock to that same place to get the “money shot”. An example of this is the popular Hyams Beach in Jervis Bay in Australia. After this spectacular beach received the title of the “whitest sand in the world,” it went from “untouched” to packed, with hordes of tourists flocking there in the summer. Popular travel bloggers started featuring the beach on their blogs and social media, and soon enough, the beach was overrun with tourists.
What most of them don’t realise, though, is that there are many other beaches in the area that are just as beautiful but far less crowded.
Even if you’re in one of the most photographed places in the world, you can still create a unique shot by playing with composition, angles and subject matter. A beach can look very different from the sky by using drone photography, but there are many other ways to photograph the same place using a variety of angles, capturing light in different ways.
A popular and well-photographed building can look very different from a unique perspective; outside a window, from a tower high up above the ground, or from down on the ground looking up. The great thing about older architecture is the detail. Every corner is embellished with interesting details which can create unique opportunities for photographs.
Instead of doing a standard straight-on shot, experiment with different and interesting angles and explore different vantage points which might offer a unique point of view. You might have to climb up hills, crouch down low, sneak into private gardens or walk into a carpark, but in doing so, you could be rewarded with a unique shot that no one else has been able to capture!
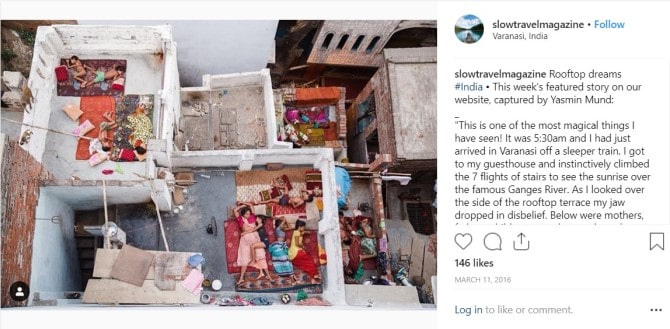
The best travel photography is about thinking out of the box; this photo by award-winning photographer Yasmin Mund makes use of a very unique angle. Captured out the side of a rooftop terrace, we see children, cats and dogs peacefully sleeping on the rooves below her.
As well as interesting angles, if you can find the road less traveled; usually the locations which are more difficult to access; you’re more likely to create unique photographs.
Use leading lines
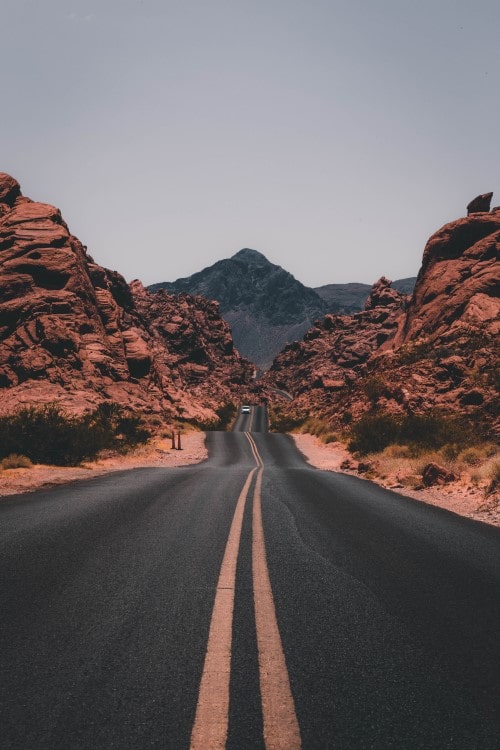
Leading lines are an easy tool that everyone from beginners to experts can utilise. When considering the composition of landscape photography, you’ll need to think about how the viewer will see your photo for the first time. How can you direct their attention to different parts of the photograph?
Leading lines can be used to create interesting photographs which convey movement and depth, by using natural paths such as roads, rivers or pathways to lead the eye towards a focal point in the photograph, like a mountain.
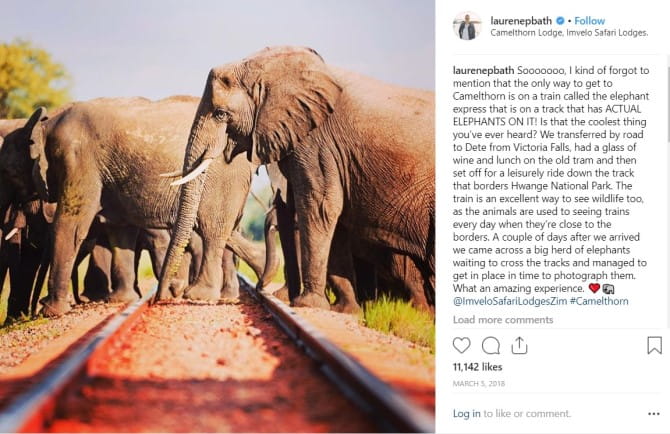
In this image by popular travel blogger, Lauren Bath, the railroad tracks in the foreground lead straight up, directing our focus straight to the elephants. You’ll notice that the eye of the elephant on the right is also directly in the middle of the shot which creates a compelling photograph.
Bringing images to life
Another clever travel photography trick involves positioning objects in the foreground in order to create context, depth, and perspective.
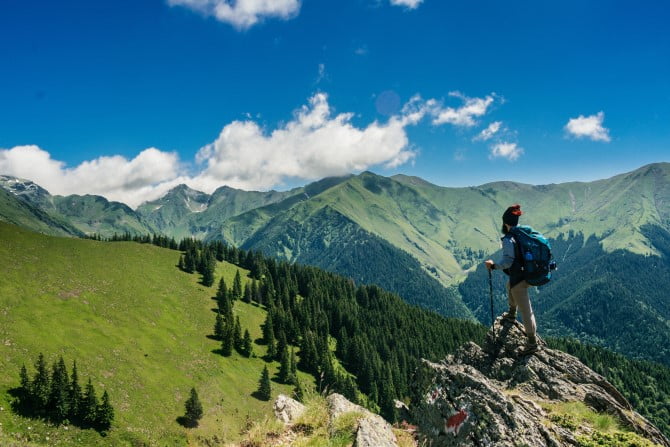
It’s hard to really imagine the epic proportions of a mountain until you see It measured against a tiny rock in a stream or a small flower in a field. This effectively gives the image much more depth; almost a three-dimensional feel. It helps the viewer feel as if they are really there.
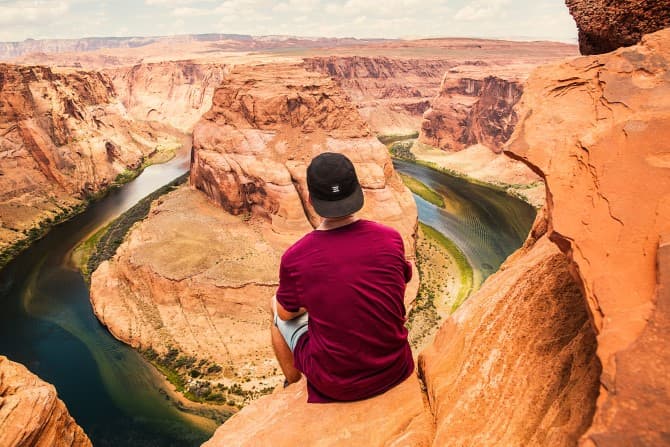
People can give the same effect in photos. A person added to a landscape shot can provide context, but not only that; this can help the viewer picture themselves in the shot. This way, they become more emotionally invested in the scene of your photograph.
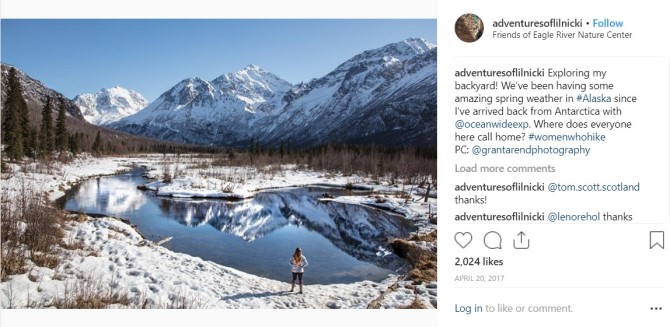
This shot by travel blogger Nicole of Adventures of Lil Nicki uses Nicole herself as the subject, to show the context and scale of the spectacular mountain in the background.
Framing, framing and more framing
Framing can be another useful tool in travel photography and is utilised by many travel photographers to draw the viewer’s eyes into the centre of the image, accentuating the scene captured within.
Too often, when we look through the viewfinder, we only think about capturing what is within the scene, because to us, it already looks so good. But how are you seeing it versus how others are seeing it? Are you seeing the view in the context of other buildings, or trees? Doorways, trees or buildings can be used to frame your scene nicely.
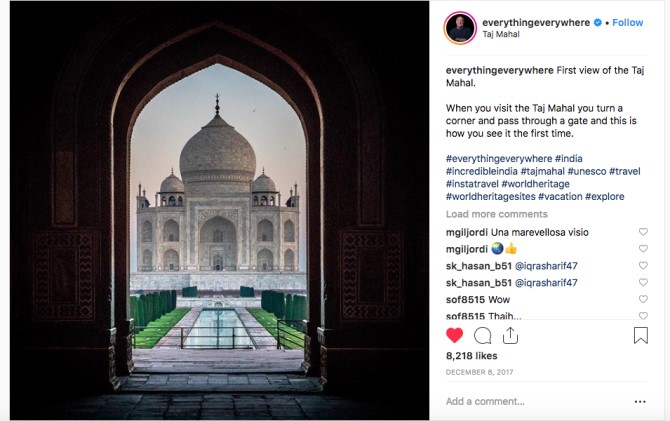
This image of the Taj Mahal by Gary Arndt is beautifully framed by the doorway of the building it is seen through. Again, this gives context and helps the viewer see the scenery as if they were really there, peeping out from behind the doorway.
Use of colour
Colour is an important component of photography, and considering how various colours will work together is an important factor in composing the perfect shot. A common trick is to try using opposite ends of the colour wheel, such as blue and yellow, red and green and other complementary colours.
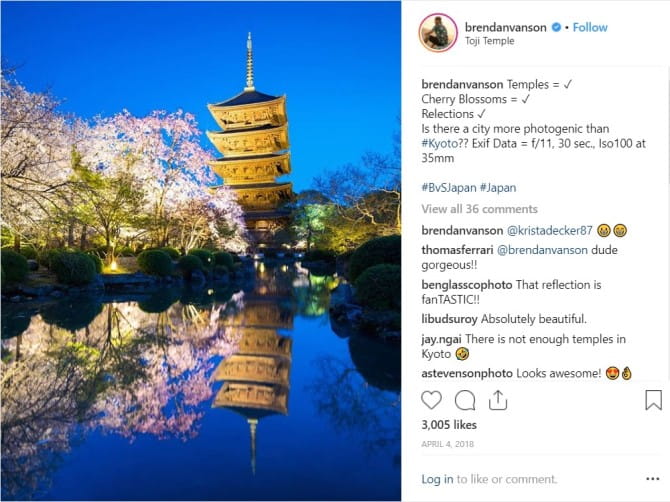
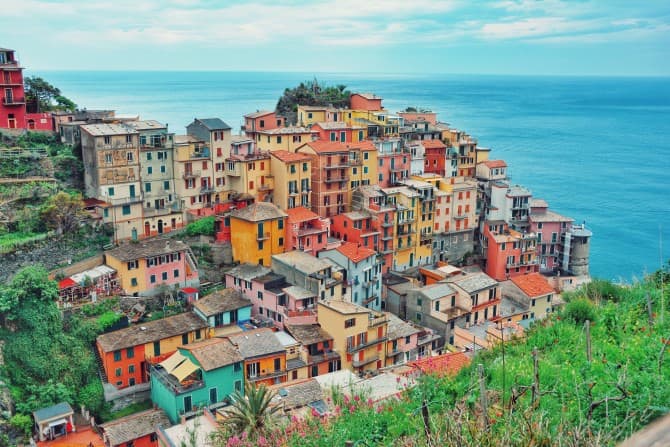
Generally, any colours which create a contrast can look good together. The blue of the sky and water won’t look great against a blue building, but against red or yellow buildings, it can look very striking, like this image below, by Brendan Von San. White and black can also be used to contrast bright colours.
When travelling, look out for striking colours. European cities can be great for this, but there is a myriad of colours in nature to use in your shots; blooming flowers, snow-tipped mountains with vivid greenery below or yellow city buildings cities against a blue sky.
Remember, you don’t necessarily need to use colour if there are other striking aspects to your image. For example, the dramatic sweeping lines of a desert may take up the entire frame with yellow colour, but the photograph doesn’t need to make use of colour if it already looks impressive.
Shooting in black and white, on the other hand, can shift the focus to the detail of the image or any striking lines created. Often used in cityscapes and street photography, the resulting look of black and white photographs can be grungier, or more classic, giving a rustic or aged feel to your photography.
Post-production
Editing is particularly important in landscape photography and can turn a good photo into a great photo. In such large-scale photographs, there is often so much detail to capture; trees, mountains, shadows, or the detail in buildings, cities or lakes.

In the editing process, you’ll want to ensure that you use just the right amount of editing. Too little, and you won’t accentuate all the beautiful detail you want to capture, but if you over-edit, this can ruin a great image. Programs like Lightroom and Photoshop are great for editing RAW images on desktop. Using these programs, you can colour correct, enhance certain features of your photo and even remove unwanted people!
These days, anyone can edit photos using simple mobile apps. These applications usually won’t have the same functionality and features as a desktop app does (not to mention your mobile screen is smaller, so you won’t be able to see close-up detail when editing), but they can still be very effective. Phone applications such as Lightroom for mobile, VSCO Cam and Snapseed are great for simple editing and can give your smartphone photos a higher-quality feel.
Once you have nailed travel photography and produced some beautiful imagery, don’t leave your photos sitting in a dusty draw. Creating beautiful canvas prints from your trips is simple with Canvas Factory. Click here to find out more.
